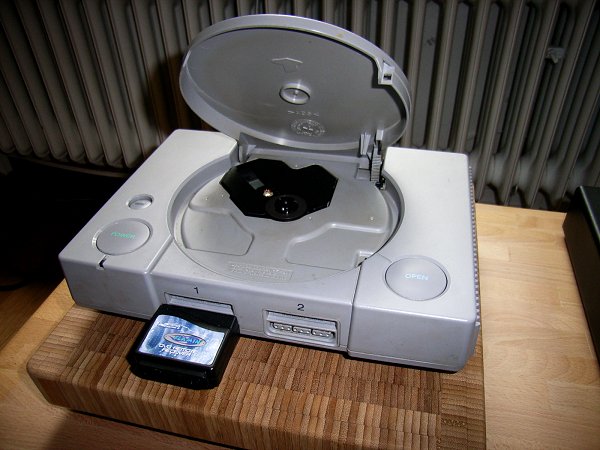
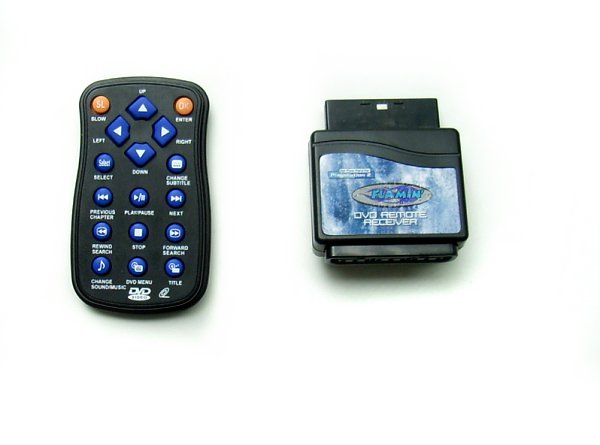
The PS1 with the RC receiver installed in the controller slot. This is a no-name DVD RC for the PS2. On the label it says " Flamin' " and "Made in China" (see update).
Open the case of the PS (screws on bottom) and remove the top cover.
Adding remote control to a Sony Playstation SCPH1002
by Mick Feuerbacher, August 2005. Updated October 2005 and November 2005.
|
For the PS 1 there exists no CD remote control. You can operate it using the standard controller, and fortunately most DVD remote controls for the PS 2 work with the PS 1 as well. Just plug the receiver into the controller slot and it will work. The "stop" button of the RC has no function, you have to press "select" instead. The other buttons you need for CD operation do work. I did not like it that the RC receiver is permanently sitting in the controller slot. Most receivers are rather clumsy since they have another controller connector on the front, so that you still have two slots available. Therefore I decided to integrate the RC into the body of the PS. The procedure described below of course holds only for the RC I have, but I guess the receiver units on the market do not differ much. Open the receiver unit - if the innards roughly look like those shown in the sixth figure below, the procedure described should work. It is strongly recommended that you read the complete text before you start to work. You are doing this operation at your own risk and I do not take any responsibility if anything goes wrong.
|
|
The PS1 with the RC receiver installed in the controller slot. This is a no-name DVD RC for the PS2. On the label it says " Flamin' " and "Made in China" (see update). Open the case of the PS (screws on bottom) and remove the top cover.
|
|
|
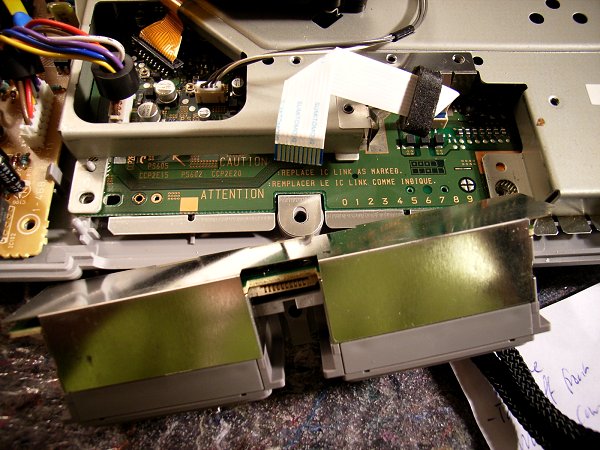
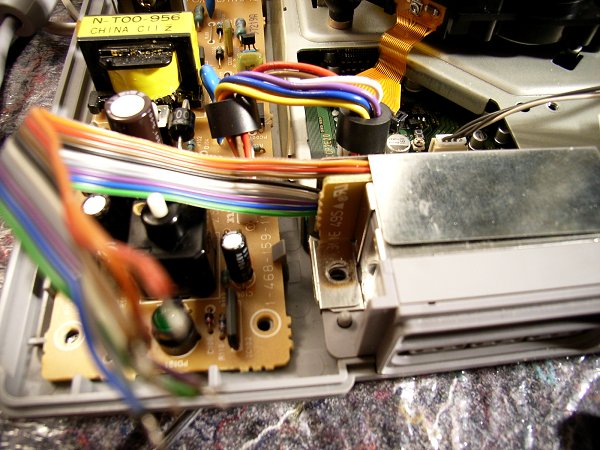
Remove the metal shield covering the front connectors (controller and memory slots). The controller unit can now be taken off the main board. Disconnect the flat cable to the controller unit. |
 |
|
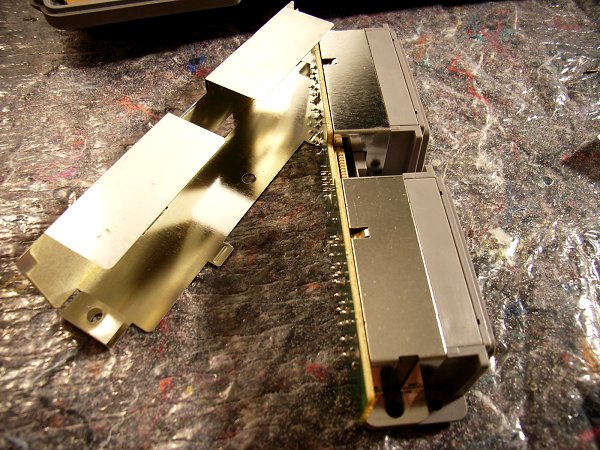
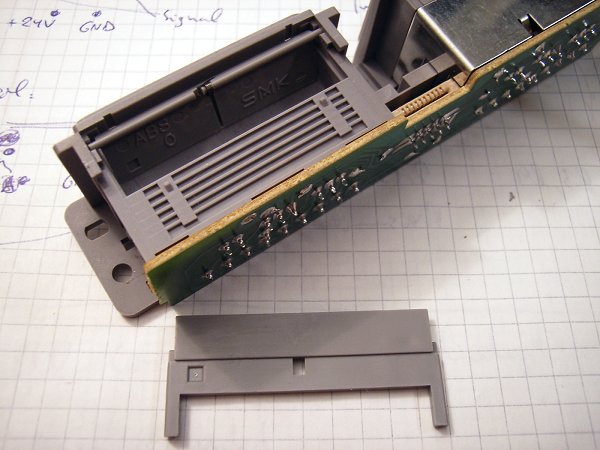
Slide back the shield covering the back of the controller unit. |
 |
|
Under it you find a PCB with lots of solder points.
|
 |
|
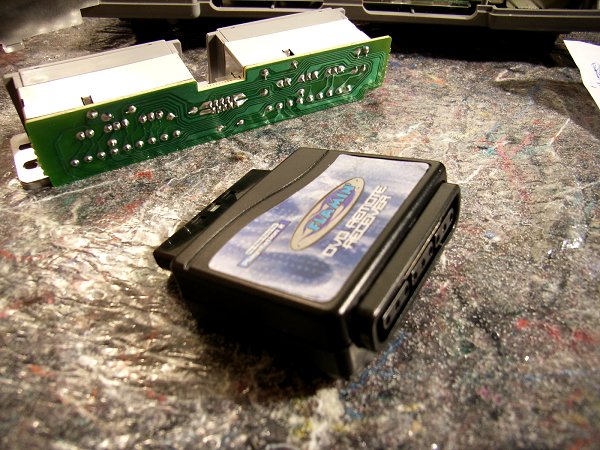
There is a one-to-one correspondence between the two lower rows of nine solder points (see previous image) and the connectors on the front.
|
 |
|
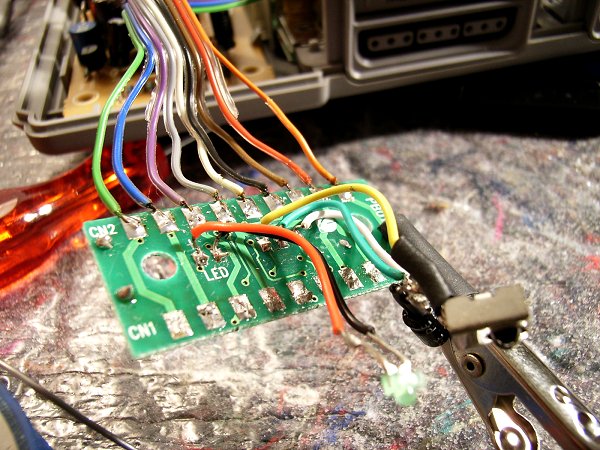
Open the receiver unit. Inside is a small double sided PCB. The tracks of the two connectors can easily be followed.
|
 |
|
The receiver itself and the LED are glued to the cover and can easily be taken out. At this point, make notes which connector, i.e. which pin on the pcb goes where.
|
 |
|
Desolder the connectors on both sides.
|
 |
|
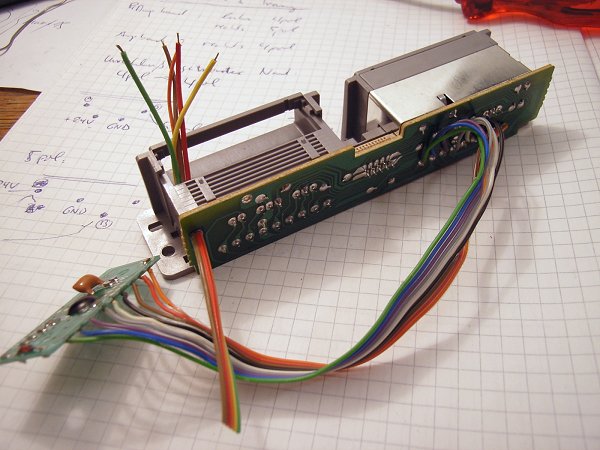
Solder thin wires to the solder points on the controller-unit PCB. Make sure that the wires you use fit in the narrow gap under the shield. When you have finished, check continuity for each wire before you reassemble the controller unit to the main board.
|
 |
|
I will remove the power supply board in my PS and put it into a separate housing. Therefore there is plenty of space on the left side of the case and accordingly I have planned to install the receiver unit there.
|
 |
|
Solder the wires to the PCB of the receiver.
|
 |
|
The rest is straightforward. Drill two holes, a small one for the LED and a bigger one for the receiver into the case in a position of your choice. Fix the LED and receiver with hot melt glue. Fix the board somewhere in the case of the PS. You may have to replace the wires to the LED and receiver by longer ones.
|
|
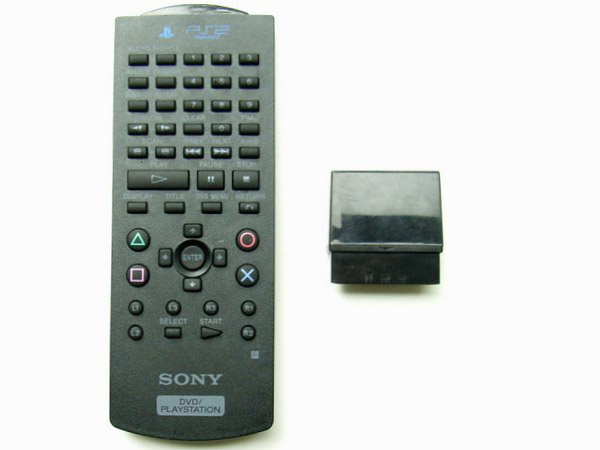
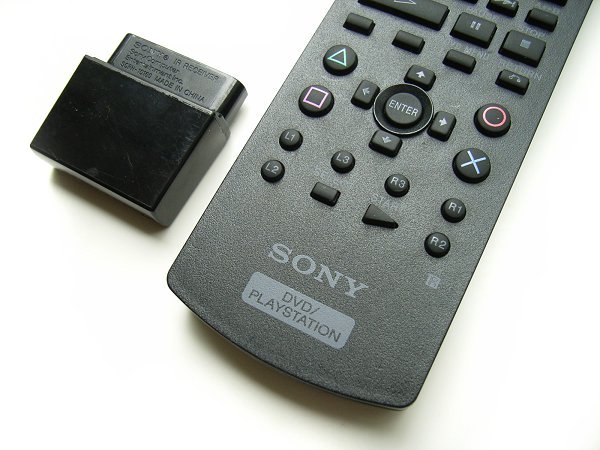
I have now also tested the original Sony RC unit. It indeed come with a driver CD but you dont need it if you just want to use the basic functions. The original Sony RC does work with the PS1. You only have to plug in the receiver into the controller slot and you can control the functions required for CD operation. Although the unit is much better built than the non original one described above, the use of it as CD RC with the PS1 has some drawbacks. First, it has a lot of buttons but you can use only six of them.
|
 |
|
These are located at the very bottom of the RC and hence it is very inconvenient to use the RC. Functions:
The larger buttons in the middle of the RC showing the correct symbols have no function. Another serious drawback is that the case of the receiver unit is closed using glue. In order to upen it (in case you want to follow the procedure described above), you have to break it, which may damage the internals. |
 |
|
For the sake of completeness let me also add a picture of the RC unit used for the procedure above. It works very well, for the CD functions the correctly labelled buttons are used (besides "stop", use the "select" key) and the receiver unit has a LED which blinks when signals are received.
|
 |
|
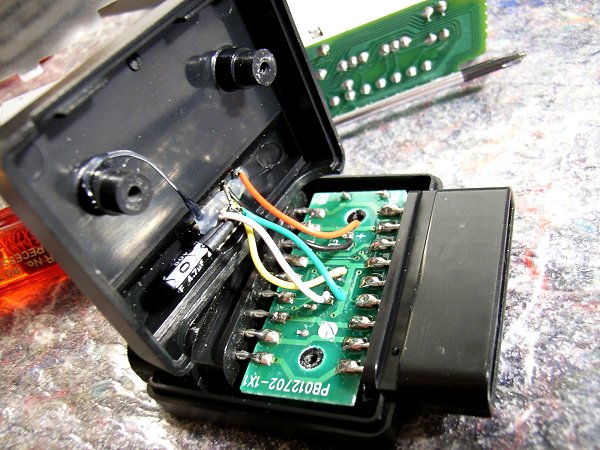
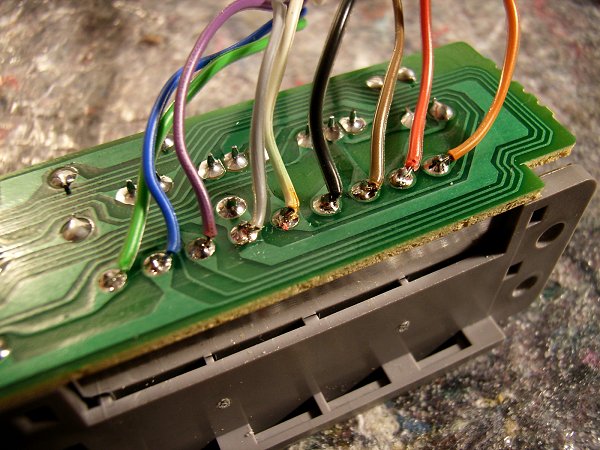
This is a procedure to fully include the RC into the PS1 body. Also, the assembly is integrated entirely into the controller-connection unit, and is therefore exchangeable between PS1 players. First, follow disassembly steps 1 to 4 given above and disassemble the RC receiver. Remove the second shield and the plastic cover of the memory slot. Solder the connection wires to the connector prins protruding through the back PCB of the controller unit as shown in step 9 above.
|
 |
|
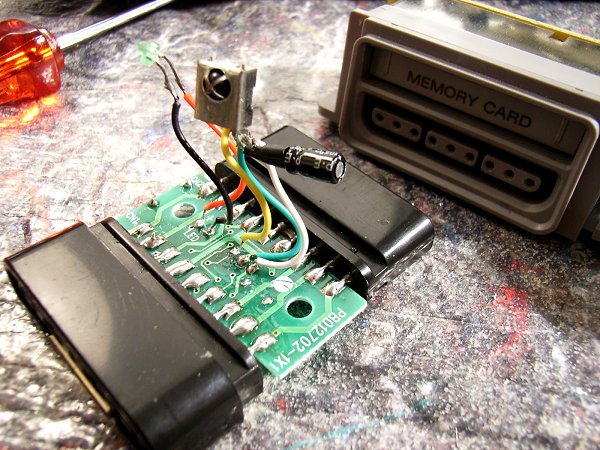
The receiver and (if present) led will be placed on the lid of the memory card slot. Five connections to the receiver PCB are required. Drill a hole through the back PCB of the connector and feed the wire trough it unit as shown. |
 |
|
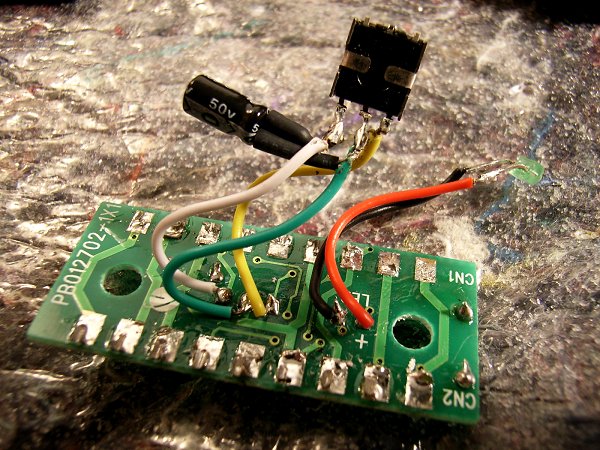
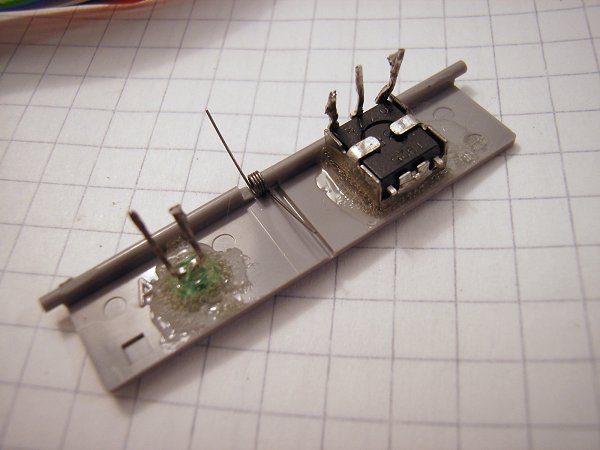
Glue the receiver (right) and the led (left) onto the back of the lid. |
 |
|
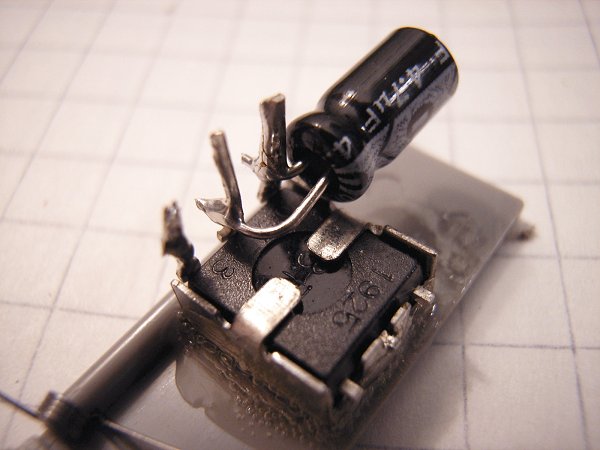
Here the capacitor of the receiver is shown, which is directly soldered on the pins. Such details may vary for different makes of RC unit. |
 |
|
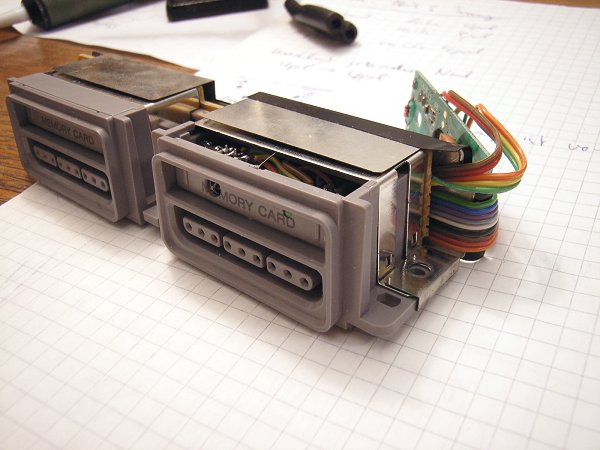
The lid with the attached and connected components is placed back into the memory slot. |
 |
|
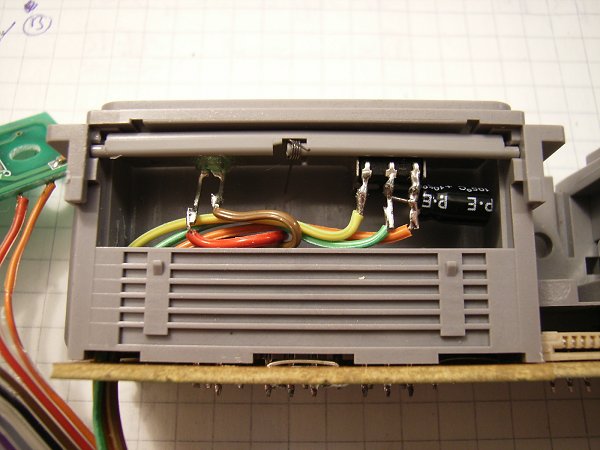
Here the completed unit with integrated RC receiver is shown. The shields are installed and I have added some insulation tape on the back in order to avoid shorts if when the unit is packed into the PS1 body. The connector wires of the receiver board and the controller unit are lead under the metal shield. |
 |
|
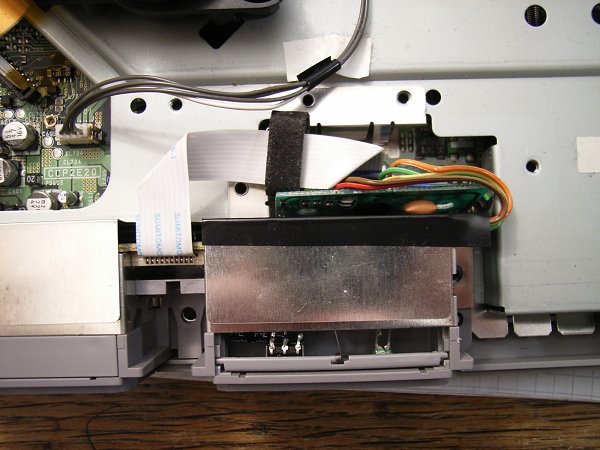
The controller / RC unit is built into the PS1. Behind the right controller connector there is a small empty volume in the metal mount in which the receiver board nicely fits. Close the cover and that's it. Details of the process may vary according to the make of your RC unit.
|
 |